Tuesday, 25 October 2011

Testing my Skills

I am very happy because my blog has had over 500 page views.  I know that’s not a lot in the great scheme of the world wide web but considering ‘The Make-up Darling’ has only been up and running for just short of two months and is only publicised through my Facebook page, I think it’s pretty impressive! When I get to 1000 page views I will run a competition for one lucky reader to win some make-up goodies or perhaps a make-over, so keep reading and encourage your friends to read it too!
For the last couple of weeks, I have been working on getting my make-up kit together and building my portfolio by doing test shoots with photographers.  These shoots are unpaid, but are great for newbie make-up artists to gain experience and confidence on shoots and, of course, to get those all-important photos.  In the final week of my course, we had a photoshoot day too, where I brought in a model (my cousin’s beautiful 17 year old nice, Shamika) and created four different looks on her.  I’ve held back on showing you these photos as, much to my frustration, I have not received all of the photos from the school.  But, I couldn’t wait any longer so here they are:
The first look I created on Shamika was inspired by an old beauty shot of my idol, Tyra Banks.  It’s just a simple base with rounded black, smoky eyes and a neutral lip:


For the second look, I added in hair extensions and winged out the eye make-up for extra drama. I added two shades of purple to the eye and darkened the eyebrows.   I contoured the face and added a bit more blusher for a stronger look:


For the third look, I wanted to create a bronzed goddess look.  Starting with a clean face, I applied foundation and then contoured the face using a dark brown powder and a liquid highlighter in a gold shade.  I darkened and lengthened the eyebrows using a dark brown matt eyeshadow, and then applied a mixture of bronze and gold eyeshadows to the eyelids, followed by a thick sweep of black cake eyeliner.  To the lips I applied a gold lipstick and then stuck on tiny pieces of gold leaf.  For the hair, I added brown and blonde extensions, and twisted, dreadlock-like extensions to the hairline, twisted them around themselves and pinned in place.  Unfortunately, most of the photos of this look are missing- I only have this one of the work in progress:


For the final look, I wanted something completely different.  I wanted to play with bright colours and create a fantasy look.  Firstly, I added colour to the hair by fish-plaiting small pieces of coloured extensions.  I twisted some of the plaits around themselves again and pinned them up.  I added bright blue shades to the eyelids, a bit of glitter and some false lashes. Under the eye, I applied a bit of green eyeshadow.   I coloured the eyebrows bright pink using face paints and applied a bright pink lipstick to the model’s lips, followed by a clear gloss.  To finish the look off, I added some paper butterflies to the hair and stuck one on the models face using eyelash glue.  I also added a diamante beauty-spot.

I had a lot of fun creating these looks.  I think the last one is my favourite, just because it is so creative and colourful, although the bronzed look comes a close second (and once I get the photos of the finished look I’ll post them for all to see).  Please let me know what you think and which look is your favourite.   I also want to say a special thank you to my model, Shamika, for being so fantastic and patient on the day of the shoot.

Saturday, 15 October 2011

So what next, darling?

Before I start on the main topic of this post, I just wanted to thank everyone that has continued to read and follow this blog.  I am genuinely surprised on the number of people that have taken an interest in my little venture.  I started this blog as a bit of fun and as a way of documenting my career change.  I have always enjoyed writing, but am not the most social media-savvy kid on the block and wanted to give it ago.  I’m astounded that people as far afield as Russia, Canada, USA, Barbados, Australia and Germany have been reading my blog!  Crazy – especially as I don’t know people in all of those countries.  I hope you continue to read the blog and please leave comments - I have now changed the settings so that everyone will be able to leave comments.  Also, please ‘like’ my facebook page: you can find a link to it at the bottom of this page.
Right, back to the topic at hand.  I have now completed my Professional Make-up Course and can now call myself a make-up artist and hair stylist!  Since graduating, I have worked backstage at a small catwalk show and done hair and make-up for a professional shoot.  But, as the days roll on, I am becoming increasingly more anxious about turning this into a viable career and making some money.  Thoughts of Public Liability Insurance, getting an accountant and registering as a freelancer are overwhelming me a bit.   I wanted to do an advanced course with a make-up school that has an amazing agency and offers a lot of opportunities to its graduates, but I really cannot justify spending over £1,000 to do a five day course right now.  The money that I put into savings while I was working in events is dwindling rapidly.  I would also like to do a course in semi-permanent eyelash extensions, but there doesn’t seem much point unless I have a space where I can invite clients to get them done.  Also, I don’t want to fall into the realms of becoming more of a beautician than a make-up artist, not that there’s anything wrong with that.  It’s just that I predominantly want to be a make-up artist in the fashion, media and entertainment industries.
I am also looking for a part-time job in a make-up store such a MAC or Space NK.  I spent last week putting my CV together and trying to make my work history seem relevant to a retail job.  Needless to say, I found it quite difficult.  I haven’t worked in retail since 2006 and although I’m certain I would do a great job in retail again, I’m just concerned that they’ll be some HR person dismissing my CV because my experience isn’t recent enough.
So, in truth, I’m not really sure what’s next for me.  But whatever happens, I’ll keep you all posted!

Wednesday, 5 October 2011

Hello Dolly!

I have always been a real girly-girl.  As a child I loved playing with my Barbie dolls. I would dress them up, do their hair and have them act out little scenarios such as “Barbie and Ken’s road trip in their white Cadillac”, “Barbie and Ken go mountaineering (up and down the stairs)” and “Barbie and Christie (Afro-Caribbean Barbie) fight over Ken”!
But my favourite ever Barbie toy was my Barbie Make-up and Styling Head.  This was a life-sized Barbie head and shoulders. You could style Barbie’s hair- I think it even came with rollers, but the best thing was that you could remove her make-up simply by running a sponge soaked in warm water on her eyes, cheeks and lips and then re-apply it by doing the same thing with cold water or an ice-cube.  It was awesome and I spent many a day pretending to be a make-up artist and hair stylist, never once thinking that I’d one day become exactly that!
So when I stumbled upon an Erasable Make-up Mannequin Kit online a couple of months ago, I knew I had to have one.  The kit includes five masks of different skin-tones which fit over a mannequin head, which you can clamp to a table.  The masks are made out of a patented facial texture material, so you can apply any type of make-up on to them and remove with the cleansing cream supplied.  They are fantastic for practising all types of make-up on.

So here are some of the looks I have practised on my mannequin.  Just for fun, I have named each of the masks after a supermodel with a similar skin-tone!
Christy sporting Lady Gaga's 'Judas' video look

Christy with winged-out eyes

Naomi's gone leopard

Monday, 3 October 2011

Bringing Sexy Back

It seems my Make-over Sundays are taking off!  This Sunday I had the pleasure of practising my hair and make-up skills on another of my best friends, Elorena. 
Elorena has great skin and amazing cheekbones. She usually keeps her make-up to a minimum, so what I wanted to do with her was bring out her inner, sexy vixen!  It was also a great opportunity for me to try out my new favourite toys: my Dinair Airbrush and Babyliss Thermo Ceramic Rollers.  I love airbrush make-up. In just a few minutes you can get a flawless, undetectable coverage that lasts for ages.  The airbrush foundation is water and rub resistant and you only need a few drops to cover your whole face.  You can have as much or as little coverage as you want and can build coverage to cover blemishes or even tattoos!
I started by setting Elorena’s hair using the heated rollers.  Elorena’s hair is cut into a bob, but I wanted to give her hair a little more volume.  Heated rollers are great for this.  They are a little old-school, and some may prefer to use tongs, straighteners or wands to curl the hair, but I think they are really handy because I can just put them in and leave them while I do the make-up.

The 'before' photo with the heated rollers in

Once the rollers were in, I airbrushed Elorena’s face and then set about giving her a dramatic, winged out smoky eye.  I used black as the base colour but then added some gold to soften it a little bit. Her eyebrows were accentuated and lengthened slightly with a matt brown eyeshadow.  Then I highlighted her cheekbones, bridge of her nose and Cupid’s bow with Bobbi Brown’s Shimmer Brick (one of my favourite products ever) and a cranberry coloured blusher to further contour and accentuate her cheekbones.  I used a pinky-brown colour on her lips to finish off the look.  To complete the hair, I removed the rollers and combed out the curls with a wide-toothed comb.  Then I applied some serum to my hands and ran my fingers through her hair to smooth down any flyaway hairs and add shine.  Finally, I pinned back a section on each side.


After


For the second look I wanted to make the make-up even more dramatic.  I added shades of purple and silver to Elorena’s eyes, added a little more blusher to the cheeks and a darker shade to the lips.  For the hair, I pulled it back into a pony tail and then added a clip-in hair piece.  I think Elorena looks great with long hair! What do you think?


The second look


Please feel free to leave comments and remember to 'like' my facebook page by clicking on the link at the bottom of this page.

Tuesday, 27 September 2011

Friends with Benefits

Best Friend n. Someone who willingly puts their face and hair in the hands of a trainee make-up artist and hair stylist of only three weeks and is happy to sit through hours of prodding, powdering and preening.
Last weekend, my best friend, Ally, kindly volunteered to be my first client outside make-up school and let me loose on her face and hair. Little did she know what she’d let herself in for.  I came prepared with a suitcase (yes, suitcase) full of make-up and styling equipment, as well as a beauty box full of eyeshadows, lipsticks and other bits and bobs. 
The first task was to blow-dry Ally’s hair.  I never realised the skill involved in doing a professional blow-dry until we were taught last week.  For a start, hair should be about 80% dry before you blow-dry it. Then you have to hold the hairdryer in your right hand and the barrel brush in the left, continually twisting the brush and moving the blow-dryer as you dry the hair. Then you have to ‘catch’ the section of hair with the hairdryer and pick it up again with the brush and use a spare finger on your right hand to section out the hair so that you do not have to put your tools down. It’s a bit like patting your head and rubbing your belly at first!
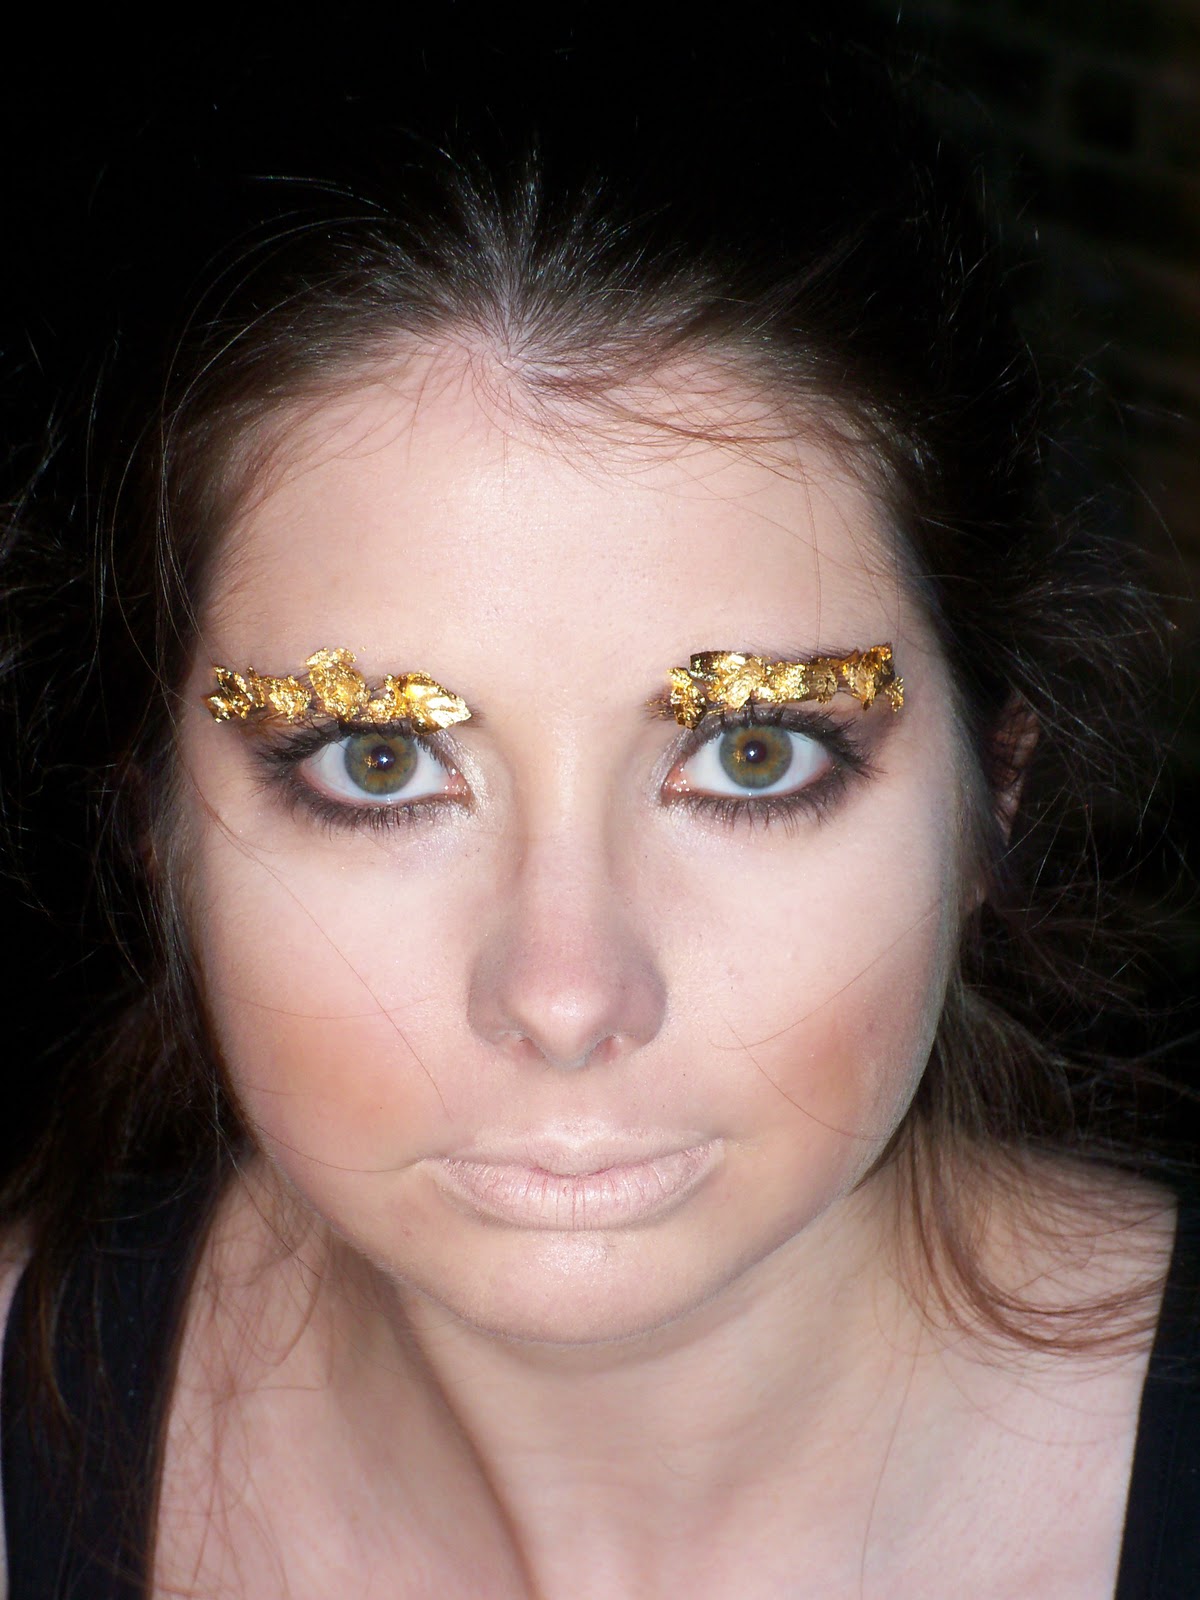
I had an idea of the looks I wanted to create on Ally.  The first one was to be quite a natural look, using shades of cream and brown to accentuate her green eyes and a rosy pink lip. As inspiration, I used the image of Rosie Huntington-Whiteley in the Burberry Body campaign.  I love the caramel colours used around her eyes which really compliment her colouring and match her hair colour.  However, Ally’s hair colour is a lot darker than Rosie’s so I used a slightly darker shade around the eyes.  The second look I wanted to create on Ally was a pale face with contoured cheeks, nude lips, dark eye make-up and gold leaf on the eyebrows. I have been dying to put gold leaf on someone for ages.  I love the flaky effect you can create with it.  Unfortunately, I wasn’t quite sure how to get the gold leaf to stick to Ally’s eyebrows without blocking the eyebrows (covering them with soft wax) first and I didn’t want to scare her by pulling out my blunt knife and wax, so I chose to coat the eyebrows in Vaseline and glitter lip fix and then stick little bits of gold leaf onto them. It worked quite well for a first attempt, but I think lip-gloss may be a better option for the future as it is a little bit stickier.
It was really great to transform Ally’s face and take her from a very simple day look to a more conceptual, edgy look.  See the transformation for yourself...
The 'before' photo

The daytime look

The Gold Leaf look


Tuesday, 20 September 2011

Popping my Fashion Week cherry

Just a quickie from me tonight....

I have always wanted to go to London Fashion Week, ALWAYS! When I was dabbling in modelling I wanted to strut down the catwalk and when I was working in events I wanted to organise the whole thing. I am pleased to announce that yesterday I finally got there, courtesy of an old work colleague, who will now forever be on my mental list of favourite people.

Walking into Somerset House was like walking into a whole new world.  A man wearing what only can be described as a pink plastic tent hurried passed me as a woman wearing the most beautiful metallic gold Christian Louboutin shoes tottered precariously over the cobblestones in the courtyard.  Exhibitors eyed me up and down as they tried to work out who I was wearing (French Connection, Topshop, Kurt Geiger and H&M in case anyone is interested) and if I could afford any of their wares (the answer is sadly, no)! MAC had a great little booth and bloggers bar, offering make-up touch ups and great little notebooks with face charts that trainee make-up artists like myself can 'colour in' with the products used on a particular model.

I went to see Todd Lynn's catwalk show.  His exquisitely tailored collection were comprised of flowing silks and linen in silver, grey, blue and black. Jackets and trousers were cut open to reveal flashes of flesh. One stand out piece was a top which looked to made entirely out of pins.  The make-up took a back seat to the clothing: fresh faces, nude lips, heavily contoured cheeks and a strong sweep of blue eyeshadow across the eyelid.

All in all my LFW experience was a great one. Hopefully by the time the A/W 2012 shows come around in February, I'll be working backstage.  That would be a dream come true!

London Fashion Week, baby!


LFW attracts the stylish and the bizarre!


The Todd Lynn show

Wednesday, 14 September 2011

Play Time!

This week, we have been getting more artistic at make-up school and working on more avant-garde and conceptual looks for photography and catwalk.  Having seen photos from haute couture fashion weeks with models sporting very imaginative, cutting-edge looks, I was keen to see if I could master the art myself.  However, I was never particularly good at art in school: I was always a bit too ‘safe’ and light-handed with my 2B pencil and this style of make-up definitely calls for you to 'play' with make-up, push the boundaries and design works of art.
We started by taking the 20’s inspired look (see previous post) and (under the instruction of our tutor) layering make-up over this to achieve a more artistic look:


Then, today, as I was the only student in class, my tutor and I had an opportunity to take the conceptual look a bit further.  I don’t know if any of you managed to grab a copy of this week’s Stylist Magazine on your way into work this morning, but in the beauty section there was an article and six page editorial demonstrating the work of an amazing make-up artist, Alex Box. Box is a truly inspirational make-up artist and her work beautifully traverses the boundaries between make-up and art. She is the Creative Director of Illamasqua, which is fast becoming my favourite make-up brand.
Using the ‘Cubism’ inspired look as inspiration, my tutor demonstrated the techniques for creating angular shapes on one half of my face and I did my best to complete the other half. 


Photo of the image in Stylist Magazine that inspired today's look!

Isn't make-up amazing?  Feel free to comment on this or any of my other posts.